
"Internet of Things" or "IoT" is we refer to it, is the current trend in the technology world. Mini computers connected to the network and equipped with sensors of all possible types. You name it and there is a sensor for in today's world of IoT. With all the digitization going around, the advancements in the technology, IoT is the front and center of it. Be it mobile payments, home automation, autonomous cars or robots every in every field, IoT is the major driving force today and its impact will grow over time. What is today a "GOOD TO HAVE" will become a necessity tomorrow.
 I am also personally excited about this and I believe that this time is the same when I first laid my hands on the computer way back in 1989-1990. It is an exciting venture where you can write a few lines to code to control the signals and tap into these small sensors. Once you get a hang of the setup, the possibilities are only limited by your imagination.
I usually start with the very basics of the setup and work my way up. Even if there is a ready-made solution for something, it is always a great learning experience when you wire your own things and put together the pieces of the puzzle rather than just buying the finished product. And as a hobby is it a great learning experience as well and keeps up in the grind with my coding skills as well.
 I have been tinkering around with Raspberry Pi for some time testing it as a media center or even a simple mini browser device hooked up to my large screen. Then I thought of making something interesting, especially for myself. The first thing that came to my mind was a simple 4 port relay circuit. How could I hook this up to my Pi and control it?
After some looking around the best possible options, I settled for the following stack:
- NodeJS on Pi
- PHP and MySQL for the Internet Access
- HTML/CSS for the Front-end
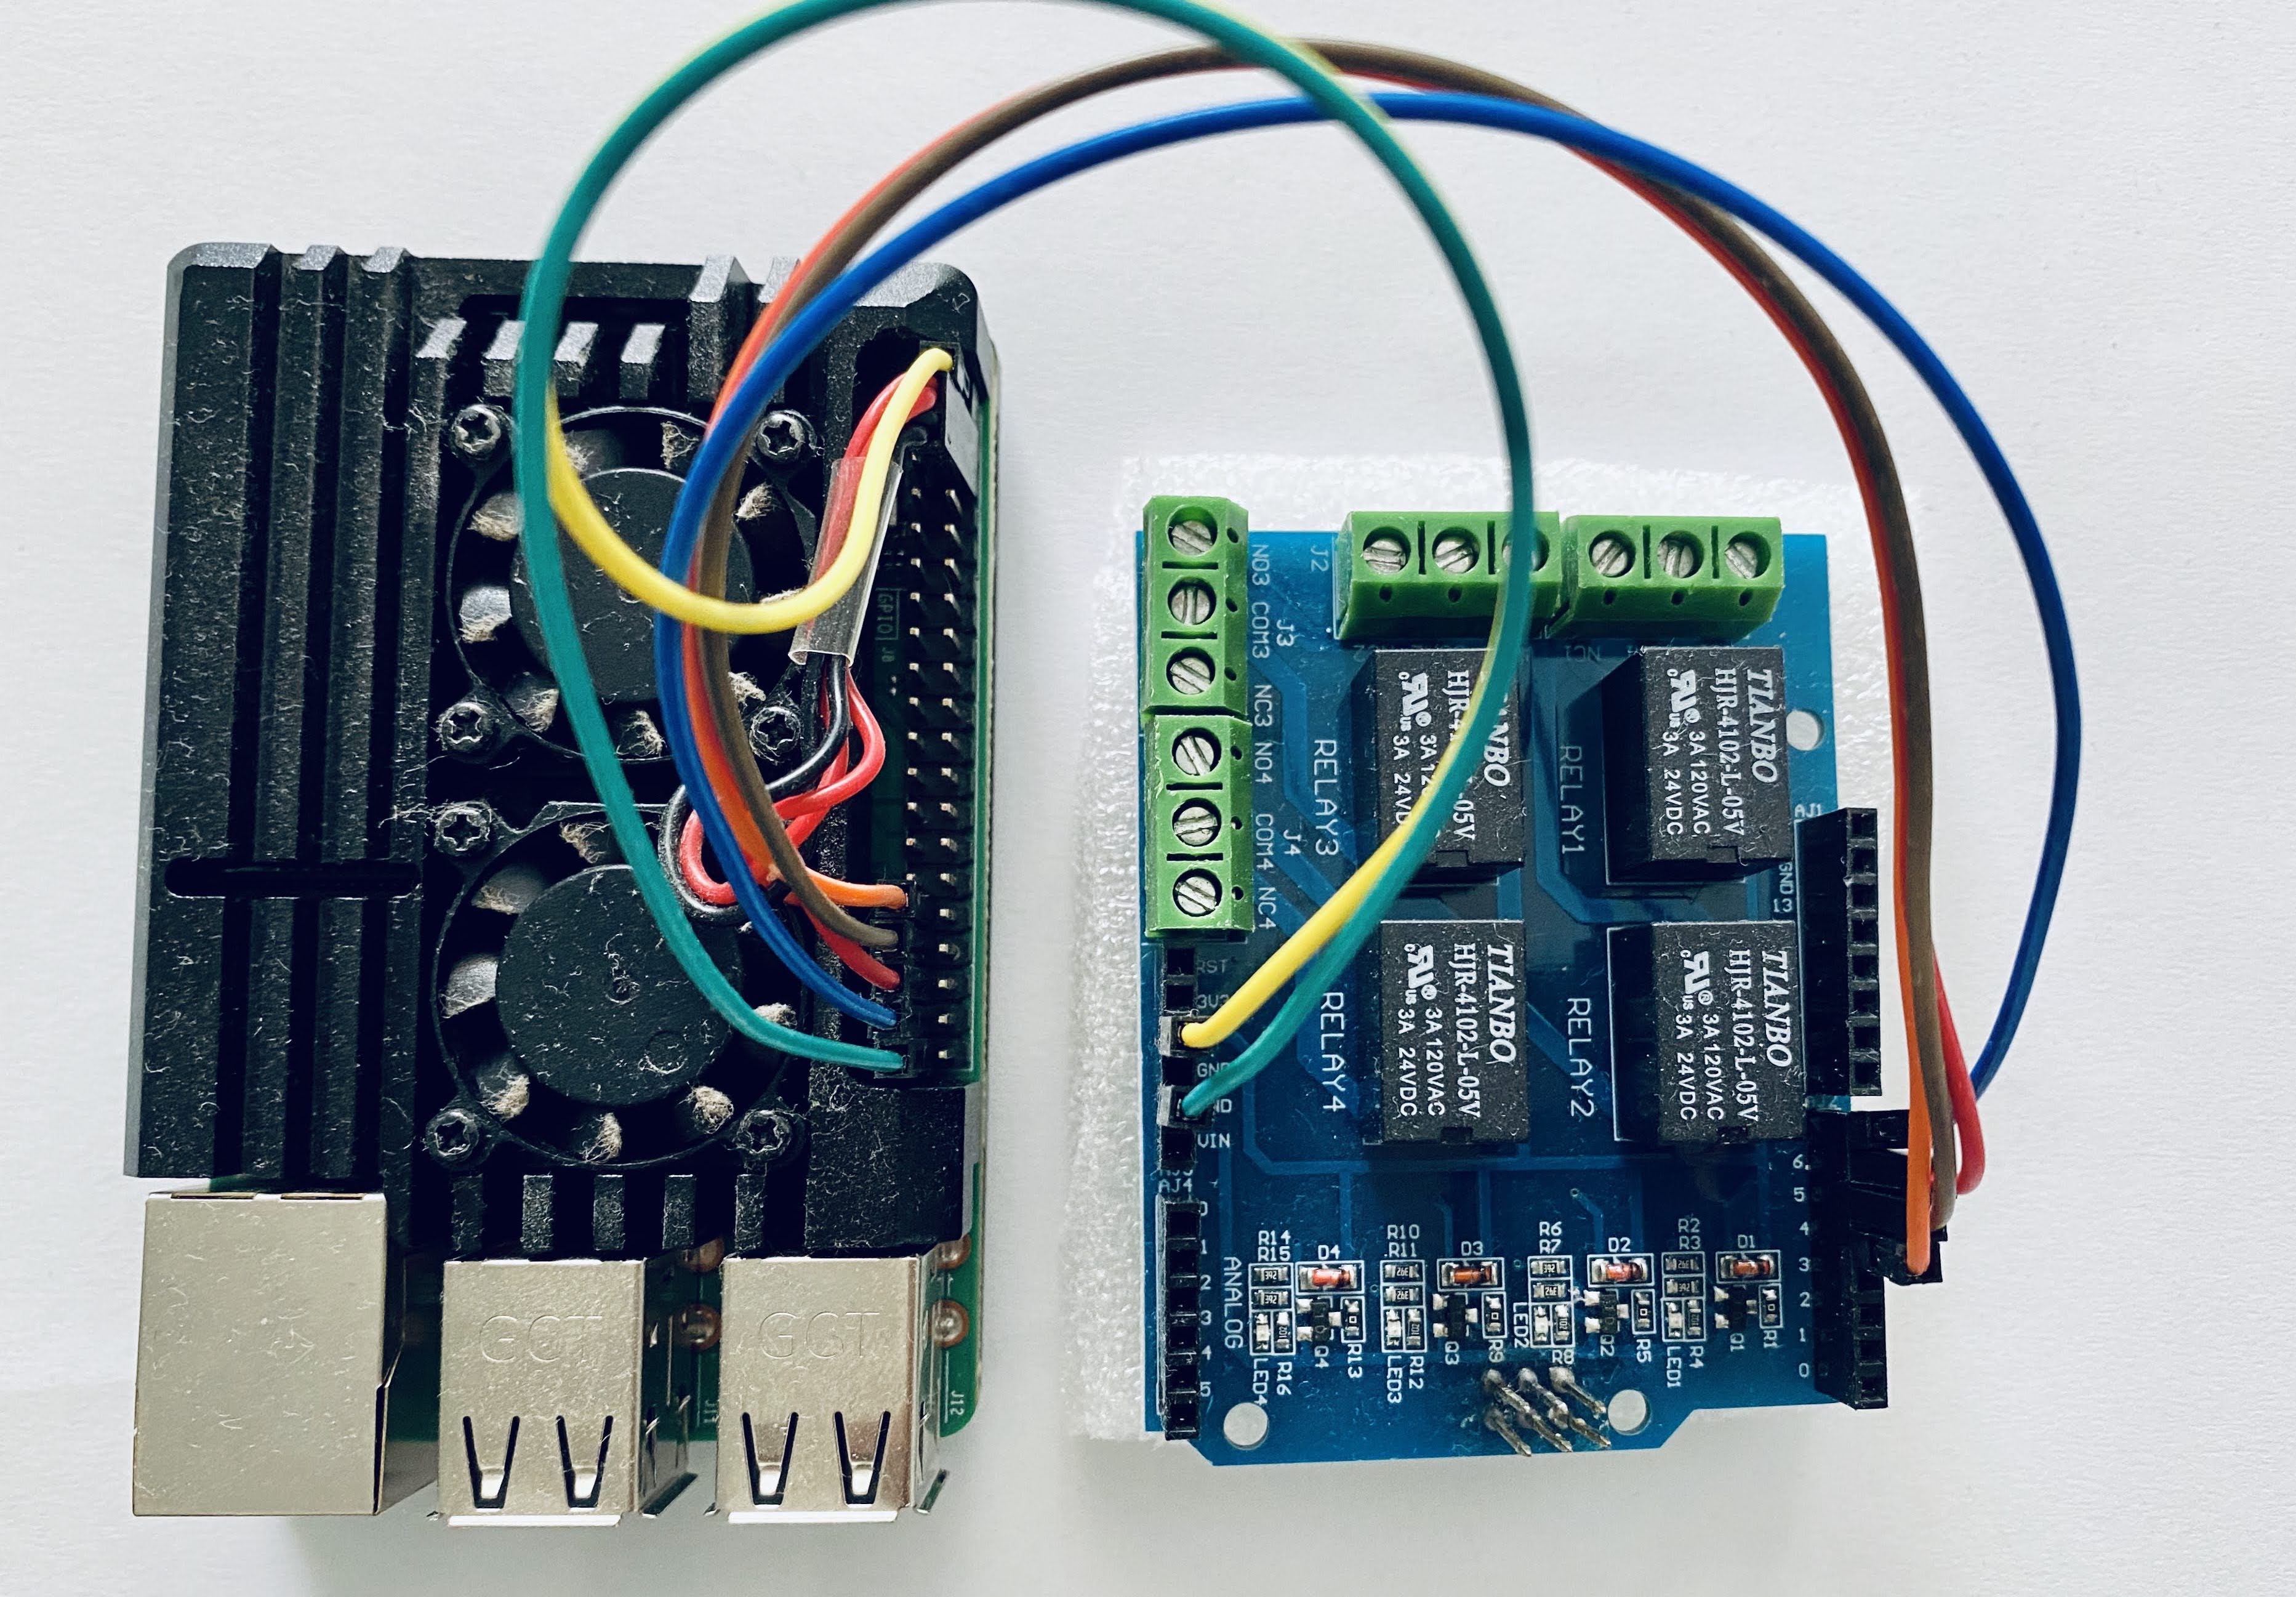
Let's first start with the wiring of the Relay to the Pi. I have a Pi3, Pi4 and 2 relays (4 Port relay and 8 Port relay). The 4 Port relay needs 6 connections:
- +5 VCC
- GND
- 4 x Signals for each of the relays on it.
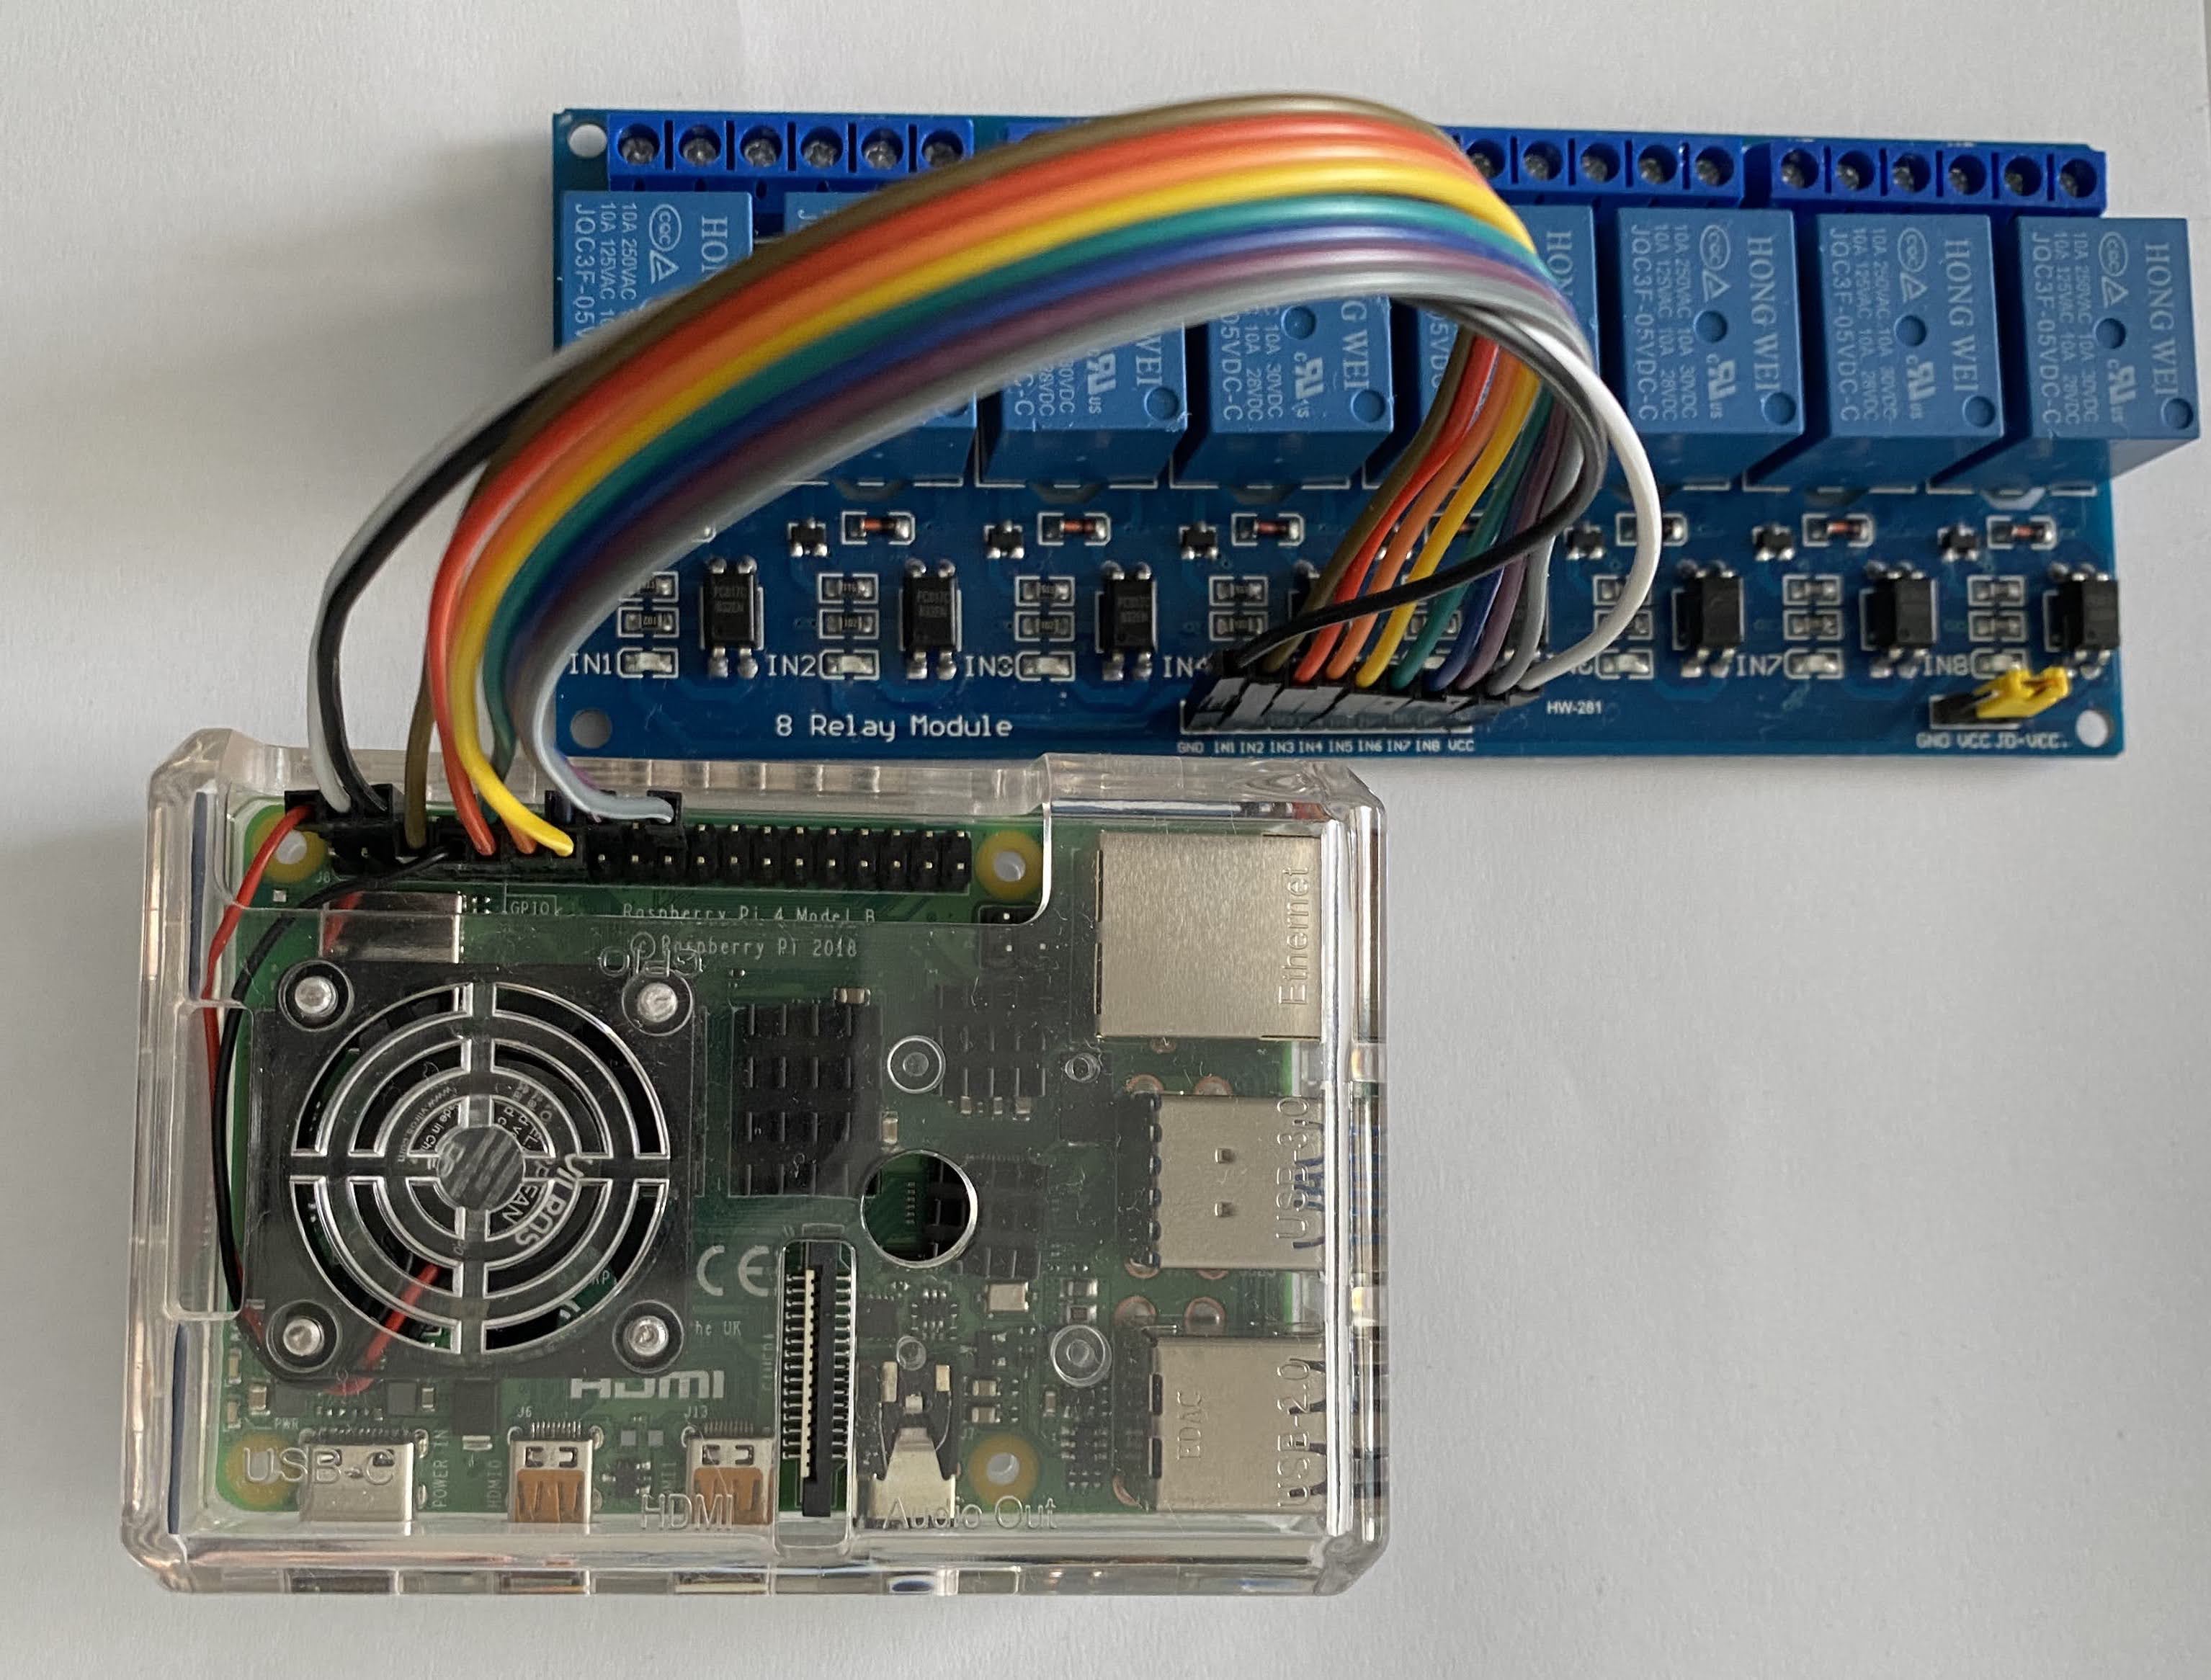
Similarly, the 8 port one requires 10 connections. +5VCC, GND and 8 signal connections for the 8 relay switches.
I have connected the Pi3 with the 4-port relay using the GPIO Pins 6, 13, 19 and 26 along with the +5VCC and GND pins. For the 8 port one, I have connected it to the Pi4 along the pin numbers 4, 17, 18, 22, 23, 24, 25, 27 and the +5VCC and GND.
After wiring the relays to the Pi, the next step was to control them from NodeJS. To enable the relay controls from NodeJS on Pi, I looked up the internet and found a ready to use library. It is called onoff. It is a very simple to use library where you import it and specify the pins and their I/O mode. Then you can just read / write the signal status on these pins to turn the switches on or off.
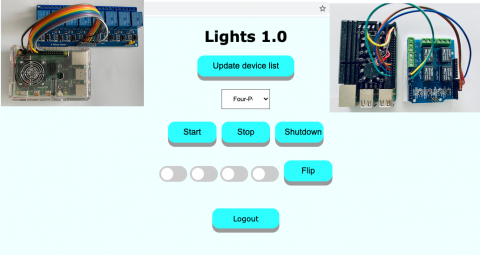
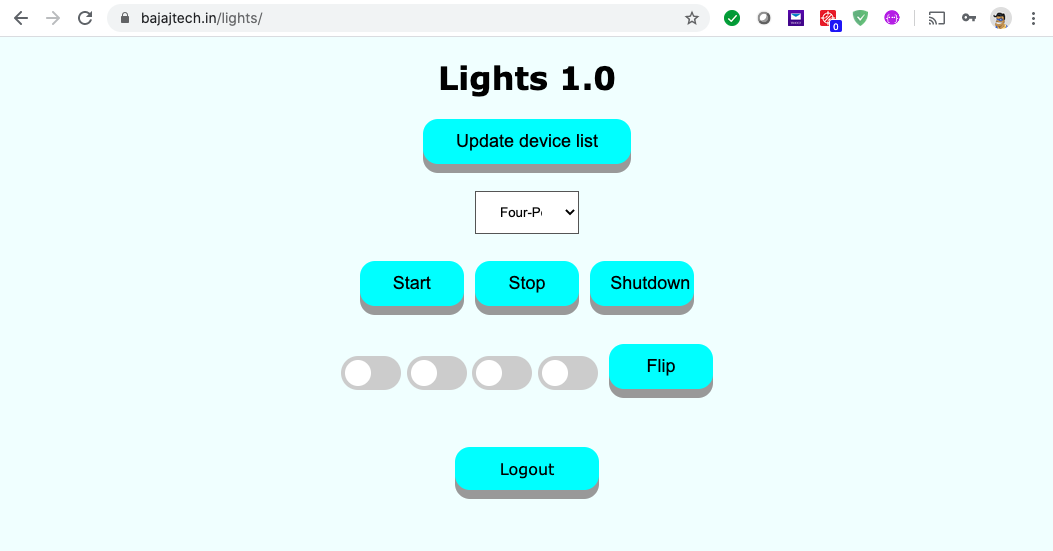
Once the basic access to the switches was obtained, the next step was to find a way of sending signals to NodeJS to trigger the "onoff" module commands. For this, I took a very basic approach. The "setTimeout" function in JavaScript coupled with PHP code and MySQL database. To start this off, I created a simple MySQL table with the device details and another table with the command indicators. Using PHP, HTML, CSS, I created a front-end which reads the device table and shows the user the list of available devices and the number of switches on that specific device. The possible commands I have managed to put in at this stage a "blink" and "on/off". In the "BLINK" mode, the switches go on and off in a sequence creating a moving effect. In the "ON/OFF" mode, the user can select a specific switch and turn it on or off. At this time, all that the front-end does is record these requests in the commands table along with the device id.
Back on the NodeJS code, upon startup, I generate a UUID using popular NodeJS module aptly called uuid. On the first run, the NodeJS code will generate the code and save it to a local file. Upon subsequent runs, it will just pick up this UUID and use it. Now that every device has a unique id, I send this to the server via a web request to my PHP code which checks if the device id is already present in the devices table and if not, inserts it there.
Now with the device id setup complete, it was time to call the "setTimeout" function. I have set this at an interval of 1 second. At this one second interval, the NodeJS makes a web request sending in the device id to the PHP code on the server. The PHP code checks the device registration and if not present, registers it. Secondly, it checks for any commands pending in the database for this device id and passes it on the device as a response to the web request. As part of this, the PHP code, also clears the commands from the table so that they are not sent again on the next call. The NodeJS code upon receiving the response, takes the necessary actions which is either start/stop the blinking process or turn a specific switch on/off. At this point, I also added the code to send the status of all the switches on the relay back to the PHP code and updated the device table with the status of the switches. Now when the user selects a device, they also get to see the status of the switches.
The last step on the NodeJS side was to ensure that the NodeJS code runs in the background and does so at start of Pi also i.e. whenever the Pi boots the NodeJS code should continue running on the background. Again with a little help from the internet, I stumbled upon a nice library to achieve it. It is called PM2.
As of now this is where I have reached. The code so far is also available on my GITHUB repos - pi-lights and pi-lights-php. The next steps are to make a mobile application on Android and iOS to view the status and send control commands to these relays but I will leave that for another day.
- 16 views